How to move from Android to iPhone
By Official SIM Unlock • 09 July, 2020

Getting a new phone is a fun and exciting event, but if you are making the move from Android to iPhone, then you may be feeling the added stress of wondering how you will be able to transfer your data, contacts, and other items from one operating system to another.
No need to stress though, we’ll lead you through it and get you up and running on your new phone before you can say ‘Siri.’ (Well… almost that fast!)
When it comes to transferring your important data to your new phone, your best bet is to turn to Google, or Apple itself. Apple even has an Android app that will lead you through the process.
(Incidentally, if you are making the move from iOS to Android, there is help for that here.)
**Official Sim Unlock have a Phone unlocking service online here that’s perfect if you’ve bought a used phone and want to use it with another network.
Using Move to iOS
If you choose to use Apple’s Move to iOS Android app, you’ll get the benefits of a really thorough move. It is available in the Google Play store. Initial reviews for the app were not good, but it has since been greatly improved and reviews after it got itself sorted out have been excellent.
The app includes the usual things, like photos and videos, calendars, and contacts for phone and email, but it also brings over web bookmarks, email accounts, message histories, and so on.
It also includes some great advice on which apps to get – since you won’t be using Android anymore, and some of the same type of services go by different names when it comes to their iOS counterparts. Even the ones that use the same names on both operating systems are, in fact, different apps though, so they will need to be purchased again in iOS form (or vice versa if you’re going the other way).
Starting with a new iPhone, your initial setup begins with the Apps & Data page. There is a clear option to Move Data from Android, and once you select it your iPhone is ready to receive. Go to your Android phone, download the Move to iOS app from the Google Play store, and your Android phone will be ready to send. Once you Launch on the Android phone, agree to the terms and conditions, and allow the app to access all of the things it asks for, you will see a page called Find Your Code. When this comes up, tap Next.
Now move to the iPhone, leaving the Android open and waiting. The Move from Android screen should be open, with a Continue button. Tap it. When the code appears, enter it into your Android phone to connect the two devices for data transfer. Select the data you want it to transfer and tap the Next button. The data transfer should begin at this point. Leave both phones open and let them do their thing.
Once the transfer is complete, you can go onto your iPhone and set up any other settings and services (including new apps) that you want.
Transferring Contacts from Android to iPhone
There are other ways to transfer data from Android to iOS phones. Here are two more alternatives, specifically for Contacts. Either is good, but if you have had your Android phone for a long time, we recommend the first one for a more thorough move.
Using your Google account (simple version)
There is a good chance that accounts have their contact information synched to a specific Google email account (such as Gmail, Google Play, etc.).
Be sure to back up your Android phone before starting the process, so if anything goes wrong, you can restore it and try again. This will not only be a good safeguard for your data, it will also reduce your stress as you see all of your important information passing from your usual device to a new one that might not be as familiar.
Once this has been done, go to Settings and then Accounts and Synch. This name might be slightly different depending on which phone you have. For example, it might be Settings, then Accounts and Backup, then Accounts. They will all be similar though, so you shouldn’t have too much trouble.
At this stage you will need to enter your Gmail account details. This allows the app to bring over your phone contacts into Google Contacts, so they should now be the same.
Now is the time to unlock your new iPhone and tap the Settings app. Here you will find Accounts and Passwords (older phones might list this as Mail, Contacts, Calendars). Add your Gmail account here and enable Contacts for the account. This will bring all of your Google contacts over into your new phone – but this can take several minutes, so be patient and don’t interrupt the process. If it hasn’t completed in 15 minutes, then you can assume something went wrong and try again, but don’t jump the gun.
Use your Google account (expert version)
If you want to make doubly sure that you have all of your contacts, and don’t 100% trust the process above, then you can go on to do the following as well. This will also ensure that the above process works for future transfers.
Open the Settings app on your iPhone and go to Passwords and Accounts. Select the Add Account option. Select Other, then Add CardDAV Account. Fill in the Server cell with ‘google.com’ (no inverted commas). Enter your full Google Account (or Google Apps) email address into the User Name cell.
Note: if you have 2-step verification enabled, you will have to use a new password that is specific to this application.
Then, in the Description cell, put in something like ‘Work Contacts’ or ‘Personal Contacts’ – whatever best describes them. Then tap Next. Set the Contacts option to ‘On’ (it might be set to ‘on’ already).
This completes the setup process. Open the Contacts app on your device and your iPhone should automatically begin synching with Google. Any time in the future you set up a smartphone, Google will have all of your contacts stored there already.
Use an Android SIM in your iPhone
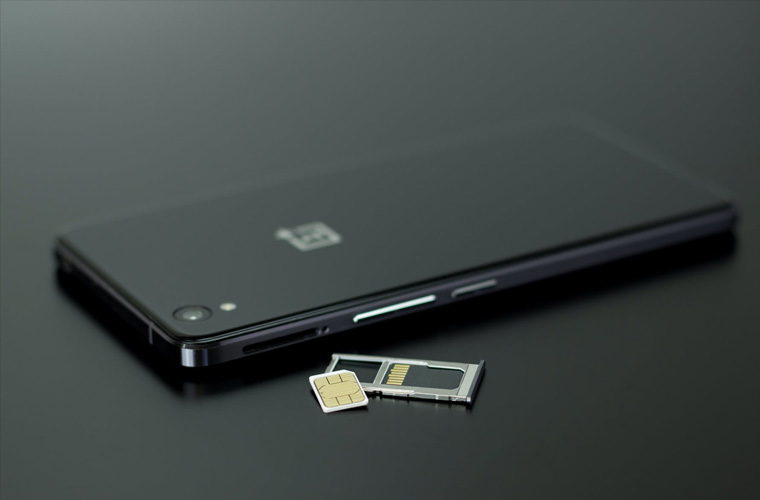
If your iPhone takes the same sized sim as your Android, you can use your old sim card to move contact information into your new phone. Some people have even cut down larger ones to fit, but we don’t recommend this, as getting it even a little wrong means the loss of your contacts and data forever.
The first step is to save all of your contacts to the Android sim card. Then insert the sim card into the iPhone (don’t throw out the iPhone sim!). Go to Settings, then Contacts, and then tap on Import Sim Contacts. The process will start immediately and shouldn’t take long. Once it is finished, put your new sim back into your iPhone and you’re ready to go – your contacts will have been transferred.
App Transfers from Android to iPhone
It would be great if we could just transfer the same apps from one phone to the next, but this doesn’t work between Android and iOS systems – they’re just too different to play well together! In most cases, you’ll have to buy the iOS apps for your iOS phone (and vice versa if going the other direction). A little silver lining is that many (not all) of your previous in-app purchases and extra content will still be accessible once you’re set up on the new app without having to pay again.
If paying for the apps again is too painful at the moment, there are plenty of free versions out there and some of them are very good. It’s worth checking around. Sign up for an Apple ID (if you don’t already have one) and you’re all set.
Photo/Video Transfer from Android to iPhone
Moving photos from one device to another can be done in a couple of different ways. The first is to use a data-transfer app.
Data-Transfer Apps
The Apple app store has a few of these apps. Each of these will have a corresponding app on Google Play Store for you to install on your Android to handle the other end of things. PhotoSynch is a good one to use (same name for iOS and Android) as it works well and is frequently updated to handle new phones and operating systems.
The apps themselves will guide you through the process.
iTunes Transfers
You can also use iTunes to move photos from one device to another. It only works for older iOSs (earlier than Catalina) and on Windows PCs. (Catalina has retired iTunes in favour of newer software.)
All you do is move the photos from your phone to your computer. Connect your phone to the computer, choose what files you want to move over from your phone, and drag those files into a folder on your computer. We suggest you make a folder on your desktop called something like ‘Photos to transfer’.
You then synch them to iTunes, then synch your iPhone to iTunes.
You could also unplug your Android from the computer, plug in your iPhone, and synch to that folder. (You don’t need to do both of these methods!)
Google Photos
Google Photos is another way to move photos from your old Android phone to your new iPhone. Access your Android photos using Google Photos (you will first need to download the app). Back up your Gallery. When you download the app on your new iPhone and sign into your Google account, you will have access to all of the photos.
An added bonus of this method is that they won’t be taking up space on your iPhone’s memory – unless you want to download certain photos to your phone for access even when you aren’t online, which can easily be done. Just tap the three little dots and choose to download.
The process of uploading the files to Google Photos may take a while the first time, but once they are there they are accessed pretty quickly – and you’ll know they’re safe.
Music Transfer from Android to iPhone
This is similar to transferring photos. The best way is to get your files moved from your phone to your PC or Mac computer. Once there, you can synch with iTunes and set it up on your iPhone in the same way you would do for photo files. Plug your Android phone into your computer and move everything over.
As with the transferring of other files, it is very important that you back up your Android phone before trying to move the files over. This not only keeps your files safe if anything goes wrong (and it sometimes does when working between different operating systems), but it will keep you from being stressed out if something takes longer than expected, or even if you’re nervous that you might do something wrong and have to restart the process.
So, once you’ve backed everything up, install and open iTunes on your computer. Go to Library and then Music (Catalina will be different), and then open the folder that holds your music files. Drag them to the Music view in iTunes. They will then be on your computer.
With the files on your computer, unplug from the Android phone and plug in the iPhone. Click Music. From there, you can synch songs or artists individually, or synch the whole library. The songs will be added to your iPhone.


